

In this post I pretend to share only one way to do friendly error page (500) and not found (404) page in Sitecore. I say one way because this is just one way to do this since you might find another that suits best your needs. This first part includes Sitecore items and config changes. Last but no least, I am using a version 8.1 update 2.
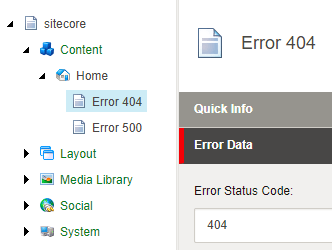
To begin, let’s create a template for the error pages that can be as complex as you need, but here is just an example with one field for the error code:

Now, let’s create two items in Sitecore (one for 400 and one for 500 error pages) using our new template. Don’t forget to add a layout to these items and publish them to the web database as well as the template if you haven’t already.
Next, we need to tell our web application to redirect to these pages when an error occur (500 page) or when a page is not found (404 page). This is done in the web.config file of the solution:

It is recommended to use “RemoteOnly” since this prevents users to see detail information about your codebase and you as developer can see the error message in the server. In addition, let’s review the all possible values that the ‘mode’ attribute can have:
- On: Always display friendly messages
- Off: Always display ASP.NET errors.
- RemoteOnly: Display friendly messages only to users not running on the local Web server.
Note: If you are testing this locally, which you probably are, don’t forget to change it to “On” since you need this enabled because you are loading the site in the same server (your local machine).
Now we need to modify the Sitecore.config file with one of the settings specified there:
<setting name="ItemNotFoundUrl" value="/error-404" />
This means that Sitecore by default will redirect all not found pages to the URL set in this setting.
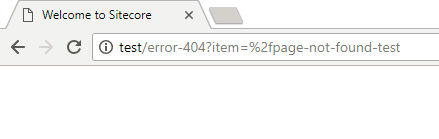
Let’s test all changes by typing some non-existent URL in a browser. You should see your page going to your default 404 page:
However, this page is not returning the correspondent 404 HTML code that is expected in this page, but a 200 that represents an “OK” response from the server:
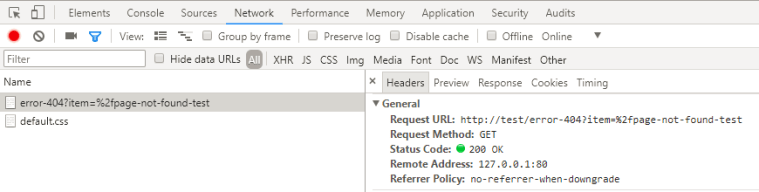
This shouldn’t work this way and in the second part we will be looking how to create little custom code to display the correct HTML code.
