

Goals are activities that visitors can perform on websites. Goals are created to track and measure how visitors engage with websites and campaigns (online and offline). For example:
- Download a brochure
- Register for an email newsletter
- Visit a particular page
- Sign up for an online demo
More advanced examples:
- You can use goals and conversion rates to measure visitor engagement.
- You can also use goals to create personalization rules that are based on the goals that a visitor achieves during a visit.
Let’s start with the basics, something similar to the “Hello World” in any language. Let’s create the most basic goal that is triggered when someone loads a page and then validate the data is on Experience Analytics. For this, we will be following the next five steps:
1.Create the goal
You have two options when you want to create goals. One is opened by clicking the “Marketing Control Panel” located in the menu and the other is in this path in the Content Tree “/sitecore/system/Marketing Control Panel”. Both point to the same folder.
Personally, I like the second option since I have the option to go to the item I want to associate this item to in the same page. However, the first option is great when you just want to tweak or change a goal already created.
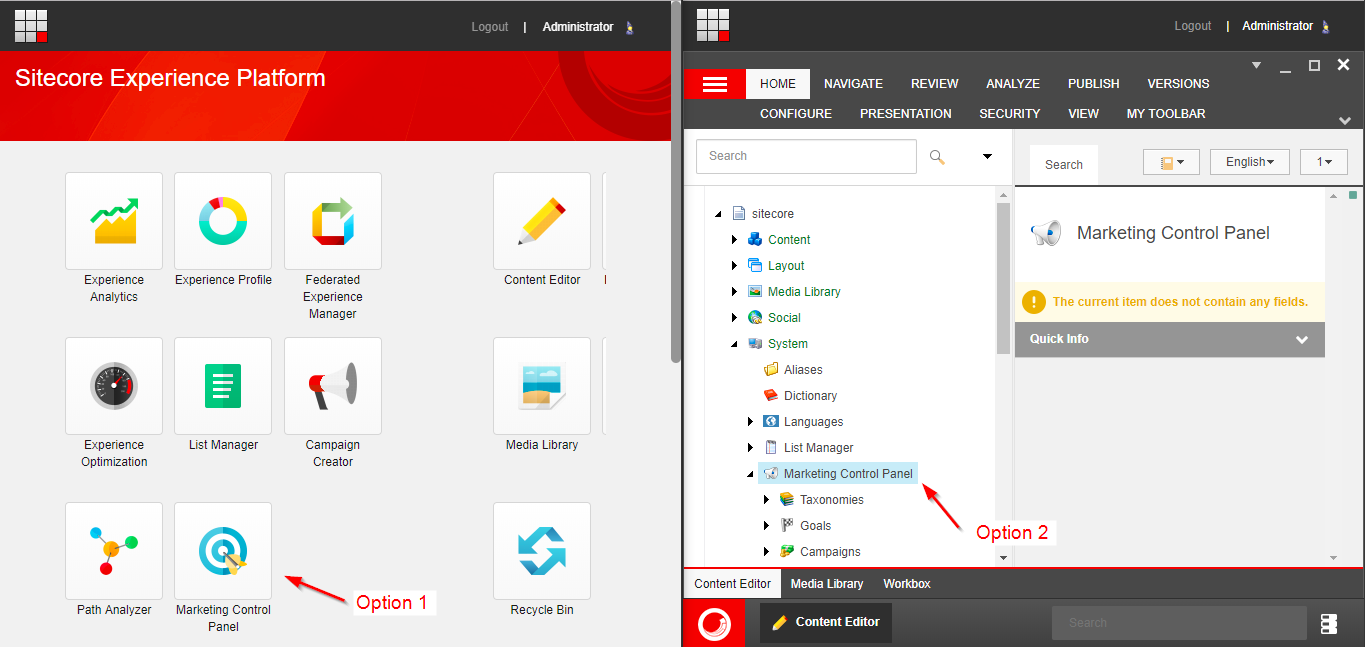
Create a goal is just a matter of click in the Goals folder and then Insert > Goal. The most important field is “Points”. Sitecore tracks points as the user triggers goals. Once the visitor leaves, Sitecore calculates the engagement value for the visit.
Part of the points field, and equally important as this number, is the ratio between engagement value points assigned to the different goals. For example, a user signing up for a newsletter could be ten times more valuable to a marketer than one simply visiting a page.
Here is a quick list of the most relevant fields of a goal:
| TITLE | VALUE |
| Name | The name of the goal. |
| Points | The number of engagement value points that are assigned to a visitor when they achieve this goal. |
| Description | A description of the action / goal. For example: signing up for a newsletter. |
| Rule | Select the rule that should be evaluated when the page event associated with this goal is triggered. |
| Is Goal | Checked by default. By selecting this checkbox you ensure that the goal appears in the Content Editor’s Goals dialog. You can then associate the goal with a content item. |
| Is System | Select this checkbox if the page event describes a system event. |
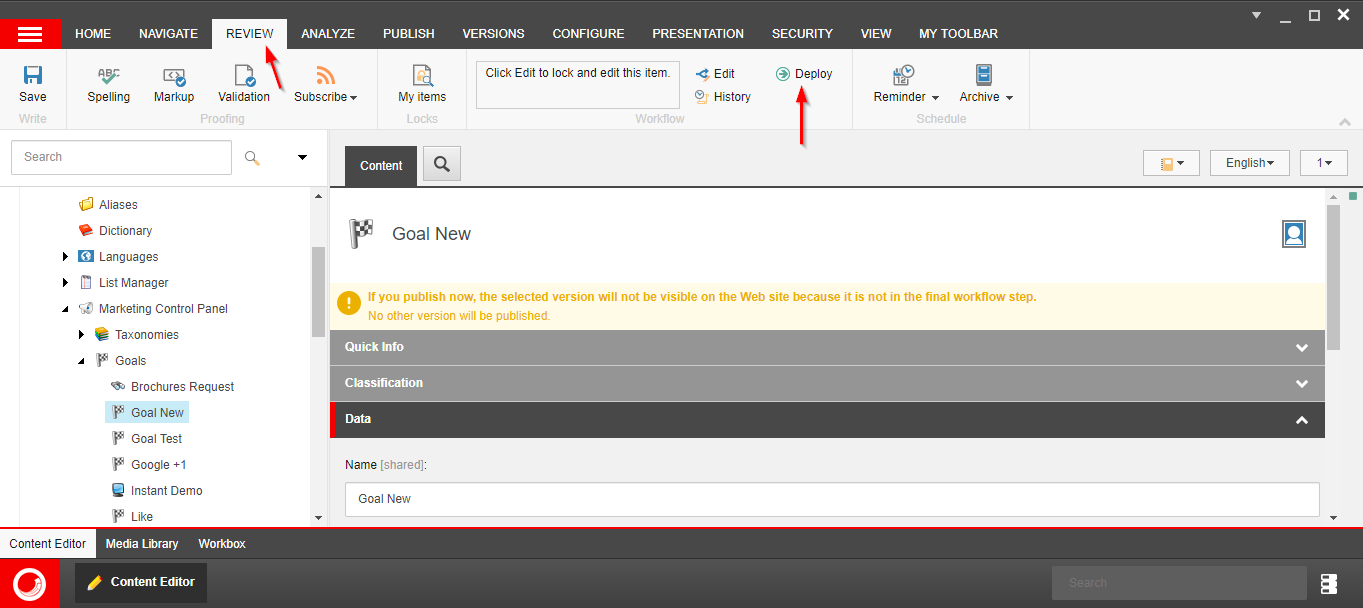
2. Deploy goal
Take in mind that a goal is subjected to the default workflow. For this reason the goal should be in the final workflow state to be deployed and published. Before working with your new goal, you need to deploy the goal by going to the Review tab and then clicking on the “Deploy” button:
The next three steps are in the next post here. I just don’t like posts that are very large 😉 Let’s continue the conversation there for the last steps. However, feel free to ask any question regarding this part in the comments.
Reference
