

Continuing with the previous post of Sitecore goals basics, this post contains the last three steps.
3. Associate a goal with an item
It is time to associate the goal we created with an item so it can be achieved every time a visitor views this item. This means, that every time we go to this page in the website the counter of the session will increase in X numbers of points we set in the step 1.
Just pick the item you will be using (Homepage in my case) and then click on the “Analyze” tab. Next, on the “Goals” button. You will, then, be presented the list of all goals deployed where you can pick the one(s) you want to use.
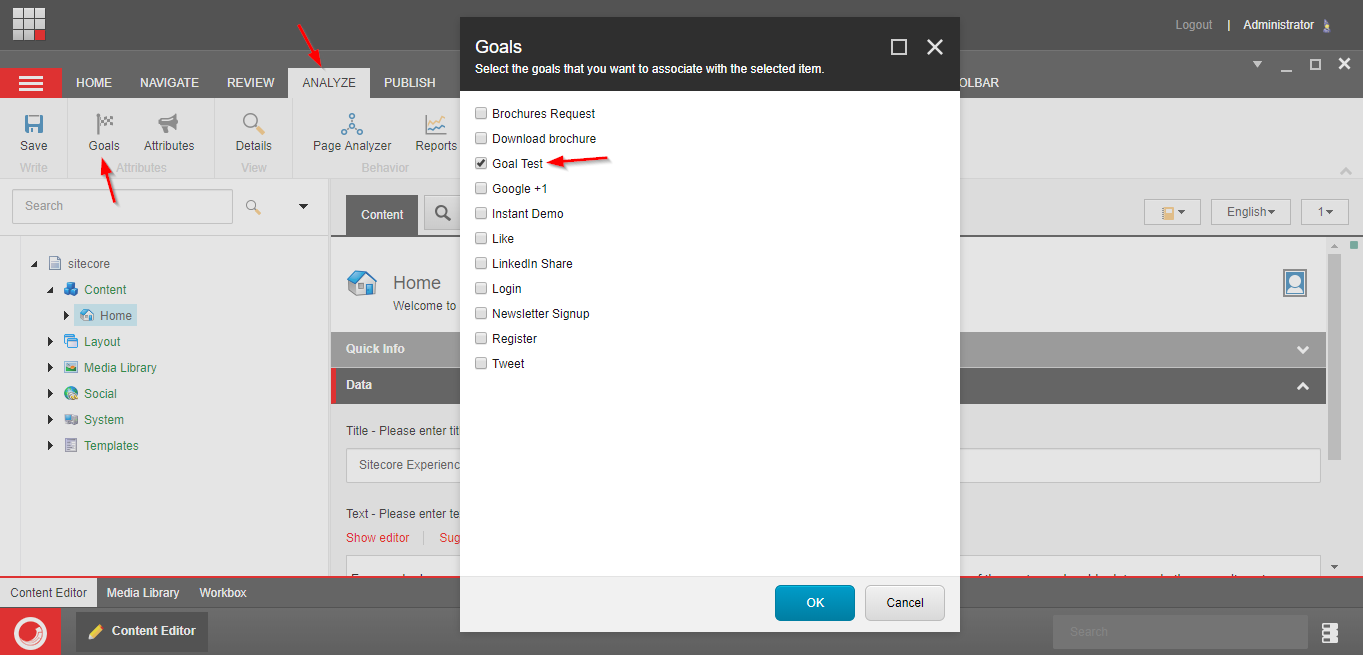
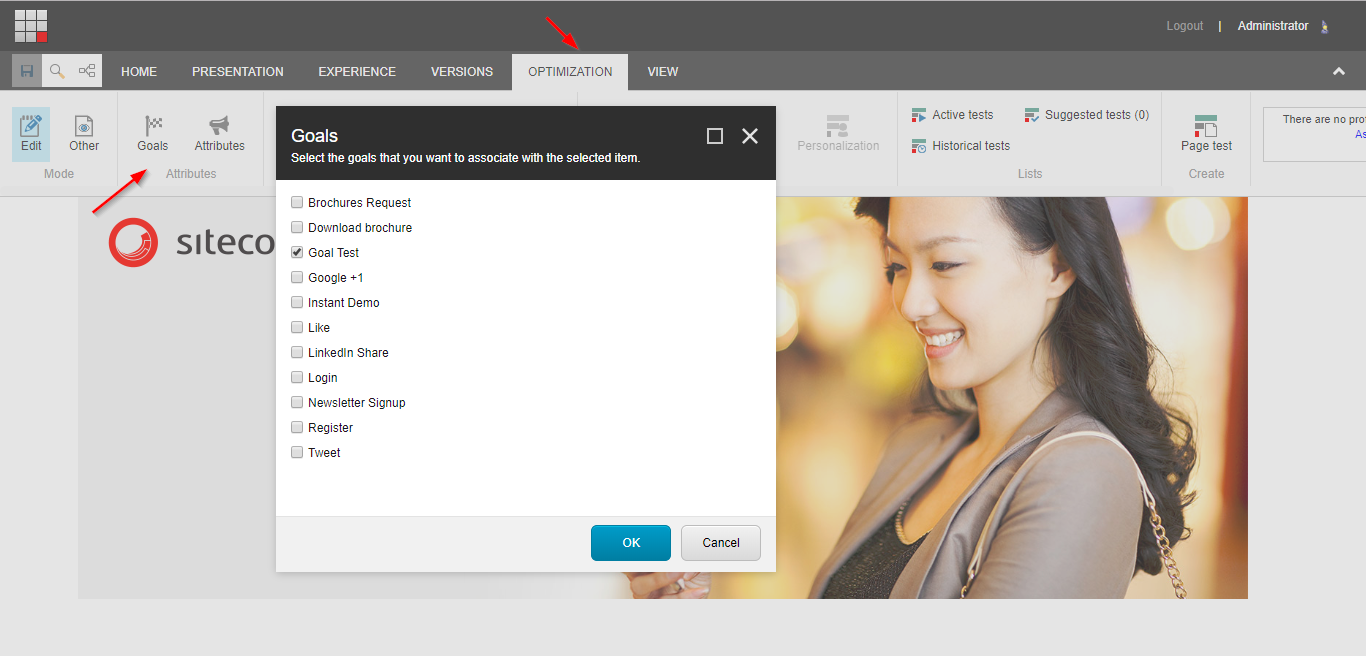
The same process can be followed if you want to associate a goal with a media item. However, if you want to use the Experience Editor to associate an item, you can go to the “Optimization” tab and then click on the “Goals” menu option.
4. Deploy item
I am sure you know how to publish an item, but just a reminder that we need to do this step.

5. View data
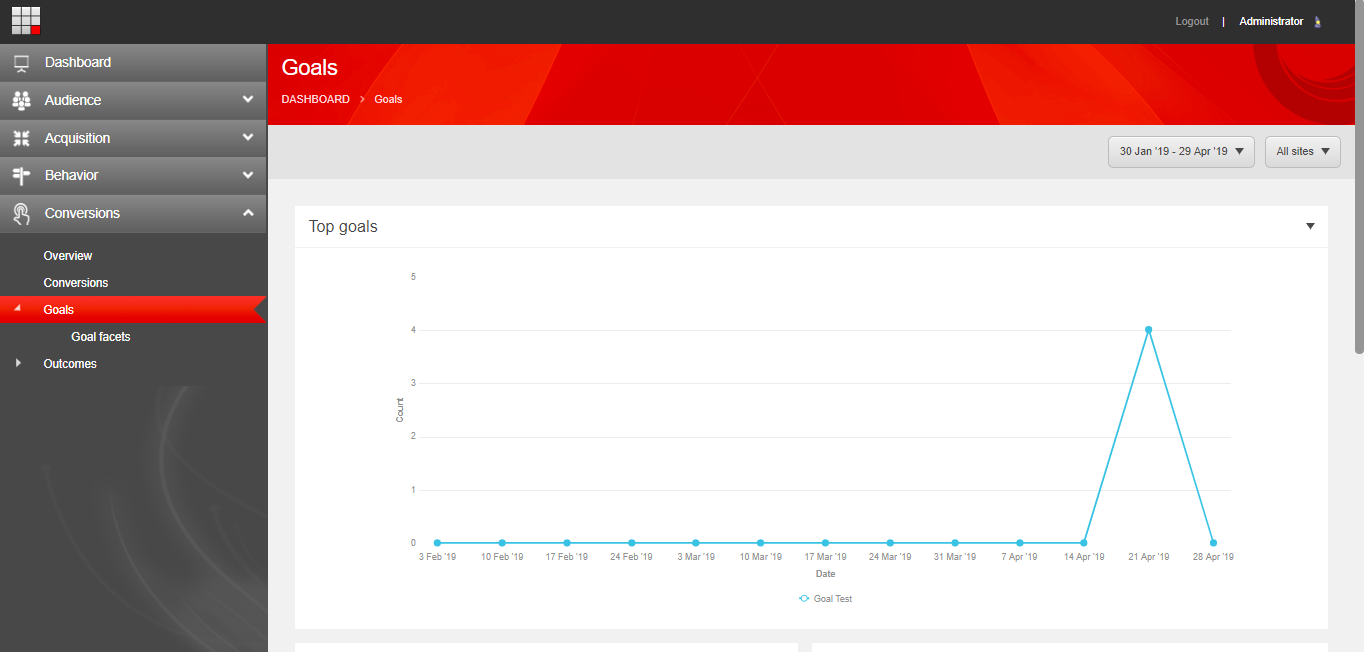
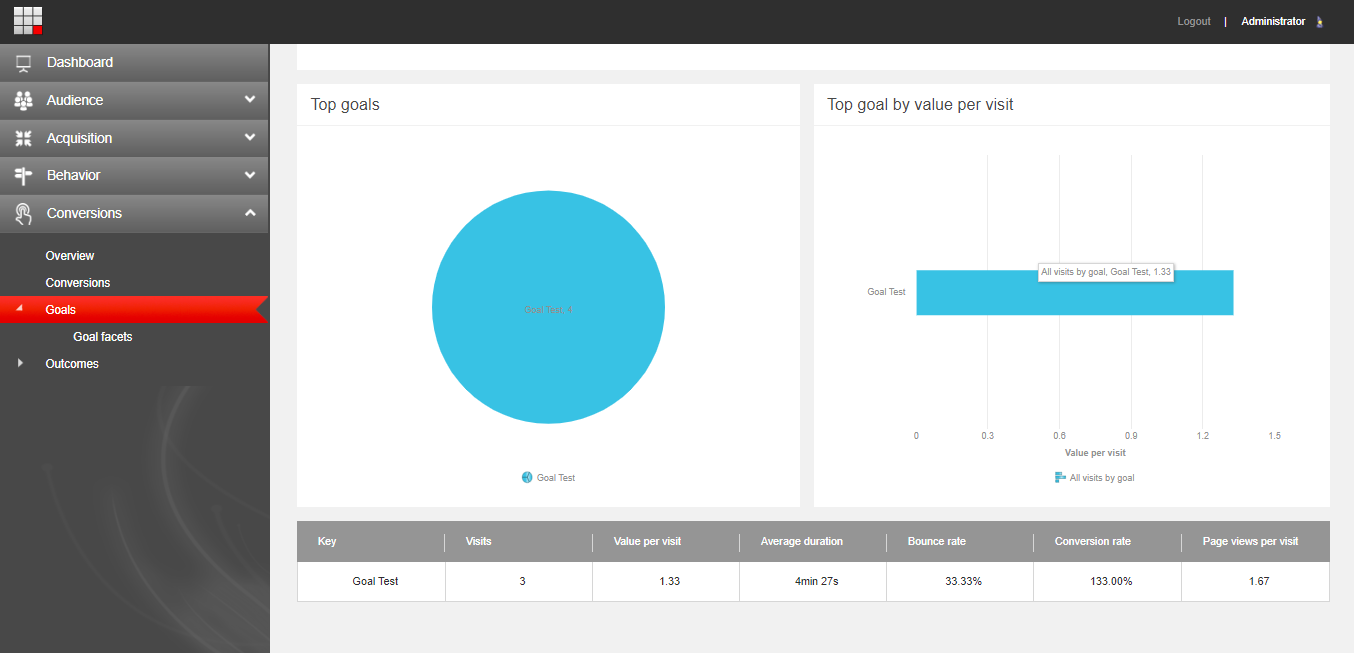
It is time to check the data after loading the page and triggering this way the goal in our case. There are two ways to see the data. One is by going to the “Experience Analytics” and then clicking on the “Goals” option of the “Conversions” menu.
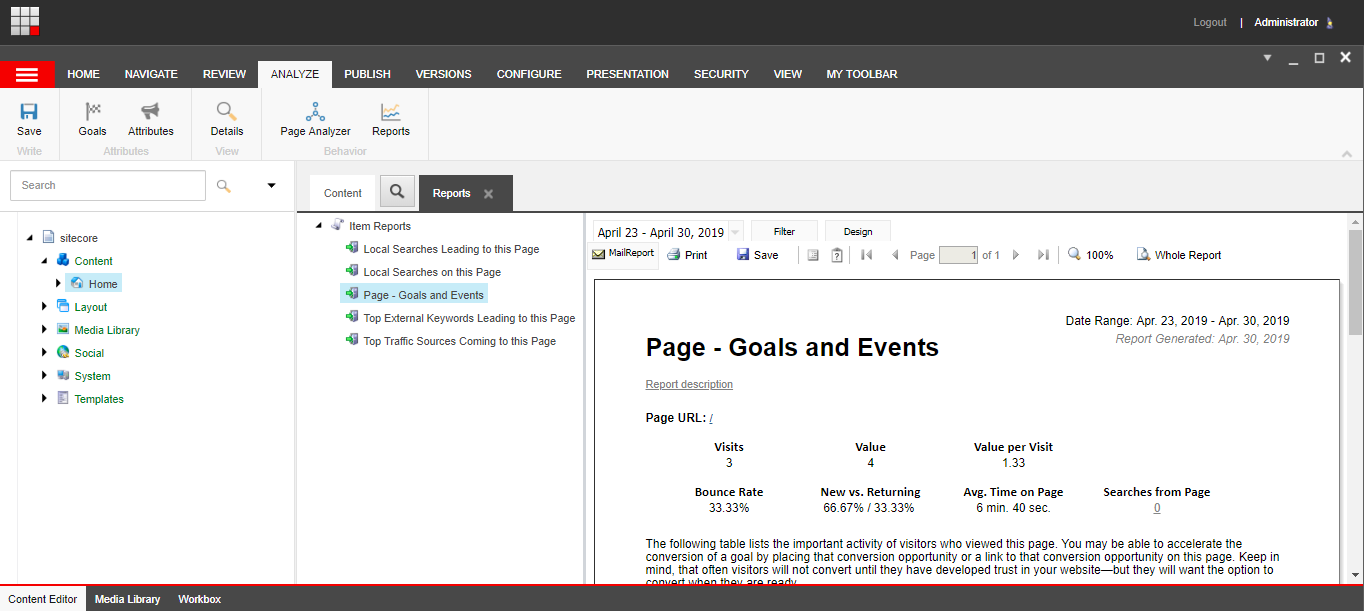
The other option is by using the item report. Select the item you associated the goal with (the homepage in my case) and then click on the “Analyze” menu to then click on “Reports”. You will be presented the different item reports you can see, this time let’s use the “Page – Goals and Events”.
In conclusion, goals are a powerful way to know more your site customers and their interaction with the system. These two posts are just a scratch in the surface for the very beginners that just want to validate goals or learn the “hello world” version of it for developers.
Reference
